IAM Anywhere is the AWS offering that will now allow users’ applications to access AWS resources securely by providing temporary credentials. This is like how the IAM is used inside AWS to interact between resources, the only difference being that with IAM Anywhere, you can access them outside AWS. With the launch of this service, there are temporary credentials provided for you on-premises servers, containers, or other computing platforms, and there is more accessible access to your applications.
Pre-requisites
Initial configuration:
- Creating a trust anchor and adding a trust policy for IAM Anywhere for the Role it will assume.
- Make sure that the X.509 certificate, signed by CA, is installed on the machine or server outside AWS and must be authenticated.
- So, with the previous point, you need to have; a bundle of your CA, an end-entity certificate with the associated private key available on the machine or server, and administrator permission for CA.
Note: If you don’t have your own CA, can be created by AWS Certificate Manager Private Certificate Authority (ACM PCA).
Walkthrough
- Create a Trust Anchor in the IAM Roles Anywhere console.
- Under Trust anchors, choose the option to Create a trust anchor.
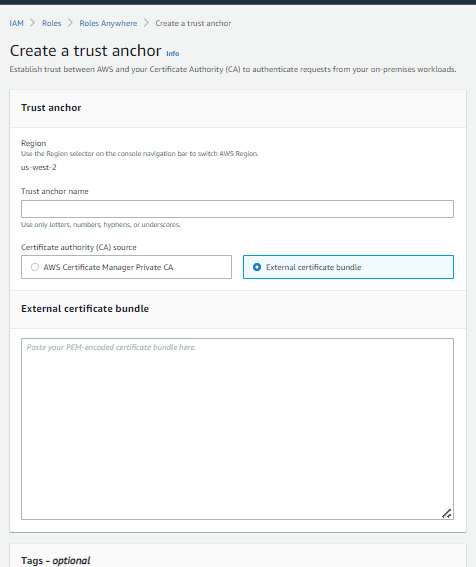
- In the below picture, we have shown you where you can enter the X.509 certificate, signed by CA. Please do make sure that the certificate is v3.
- There is another option where you can choose AWS Certificate Manager Private Certificate Authority (ACM PCA) and select from the available options.

5. Next, create a Trust policy for the IAM role that is going to be assumed by the on-premises server or machine. The trust policy will look like this:
{
  "Version": "2012-10-17",
  "Statement": [
    {
            "Effect": "Allow",
            "Principal": {
                "Service": "rolesanywhere.amazonaws.com"
            },
            "Action": [
                "sts:AssumeRole",
                "sts:SetSourceIdentity",
                "sts:TagSession"
            ]
        }
    ]
}
6. Next create an identity-based policy to and add to the same role you mentioned the trust relationship above. For example, the below role gives programmatic access to read and write:
{
  "Version": "2012-10-17",
  "Statement": [
    {
      "Effect": "Allow",
      "Action": ["s3:ListBucket"],
      "Resource": ["<arn>"]
    },
    {
      "Effect": "Allow",
      "Action": [
        "s3:PutObject",
        "s3:GetObject",
        "s3:DeleteObject"
      ],
      "Resource": ["<arn>"]
    }
  ]
}
7. After the above roles and policies are created, we move on to creating a profile:
- In the IAM Anywhere console, navigate to the profile section at the bottom of the page and select Create.
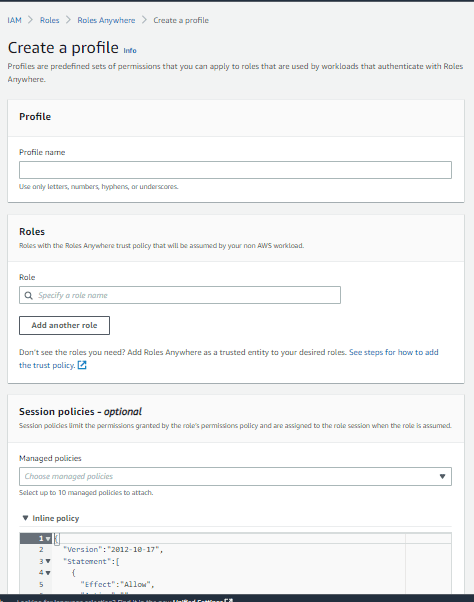
- As shown below, enter a profile name, then under the Roles, enter the Role you created with IAM Anywhere Trust policy. Then create the profile.
- Another thing to note here is the Session Policy. The Session policy can be used to give more granular control to the profile in terms of either restricting or giving access across the resources.

Using IAM Anywhere:
IAM Anywhere provides a credentials helper tool that can be used with processing credentials functionality supported by AWS SDKs. To know more about IAM Anywhere credential helper tool and how to get it, visit here.
1. Next, we need to edit the config file. Paste the below content in the .aws/config file:
# ~/.aws/config content
[default]
 credential_process = ./aws_signing_helper credential-process
    --certificate /path/to/certificate.pem
    --private-key /path/to/private-key.pem
    --trust-anchor-arn <TA_ARN>
    --profile-arn <PROFILE_ARN>
    --role-arn <ExampleS3WriteRole_ARN>
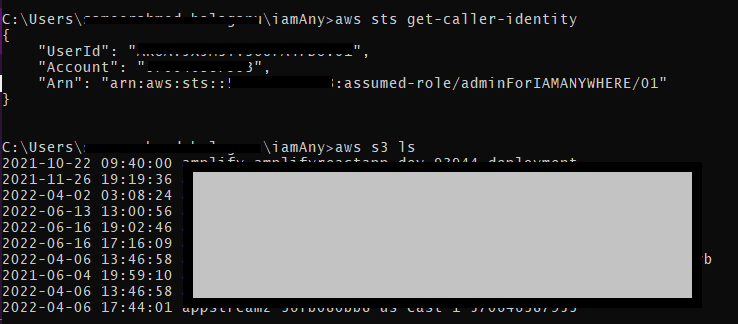
- After updating the config file, use aws sts get-caller-identity and check whether the assumed role is the same.
- Now, we will call the s3 API to list the buckets. If everything is set up properly, then the output should be the list of buckets:

As we can see, the list of buckets is shown, we have configured IAM Anywhere, and according to the policy the role is provided, we can list the S3 buckets.


